Before acquiring the kit, I searched several forums for answers to what would fit and how much it would lower the car.
The answers I got were....unclear. Except that 90-96 springs would fit, and that 94-96 Impala SS springs would lower the car about 1".
So I jumped in and bought a 1" lowering kit for the 94-96 Impala SS for $280 on eBay.
The complete name of the kit is:
Eibach Pro-Kit - 1" Lowering Springs for 94-96 Chevrolet Impala SS
Part #3837.140
The springs in the kit:
Front #3832.001
Rear #3837.002
Lowering specs:
Front 1.2"
Rear 1.0"
I will write the actual lowering specs on my 77 at the bottom.
Here is a picture of the car right after I got it home
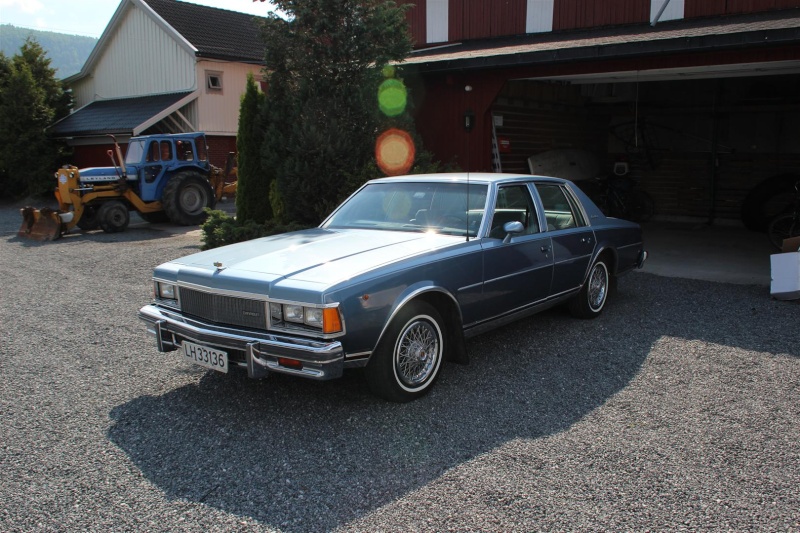
And here is a picture with some test wheels from my Camaro. That's 235/60 in 15x8 with app. 4" BS in front and 295/50 on 15x10 with 5" BS in the back.
The rears actually fit great.
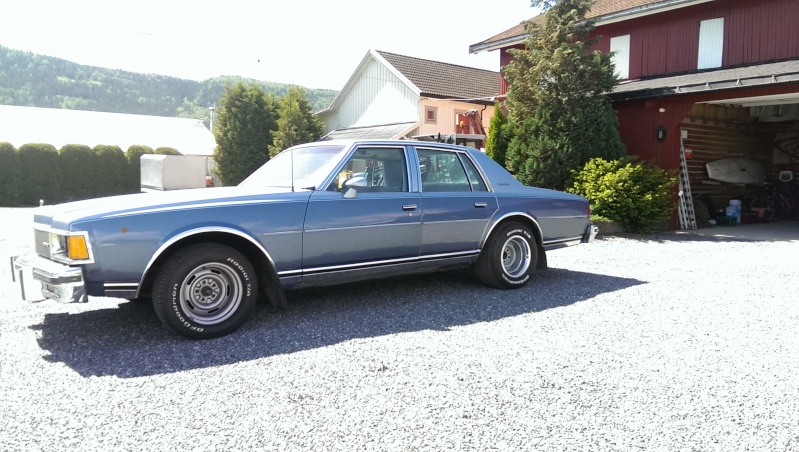
Now, here are the wheels I was using when the kit was installed. Same font wheels, same size tires in the rear but with less BS (too little for 295)
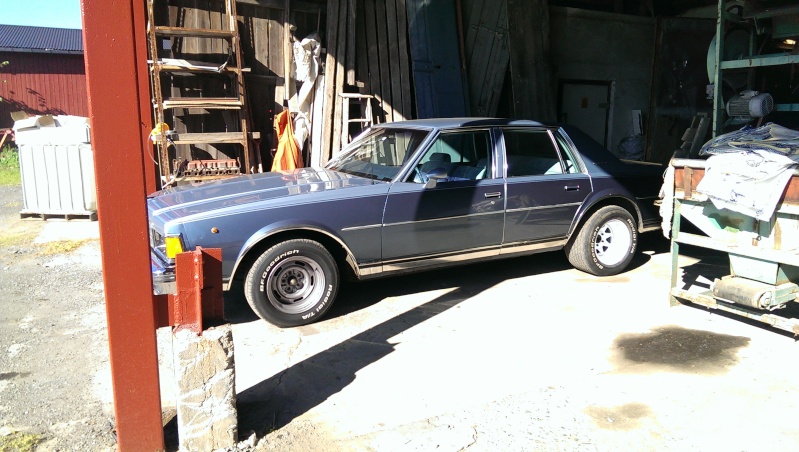
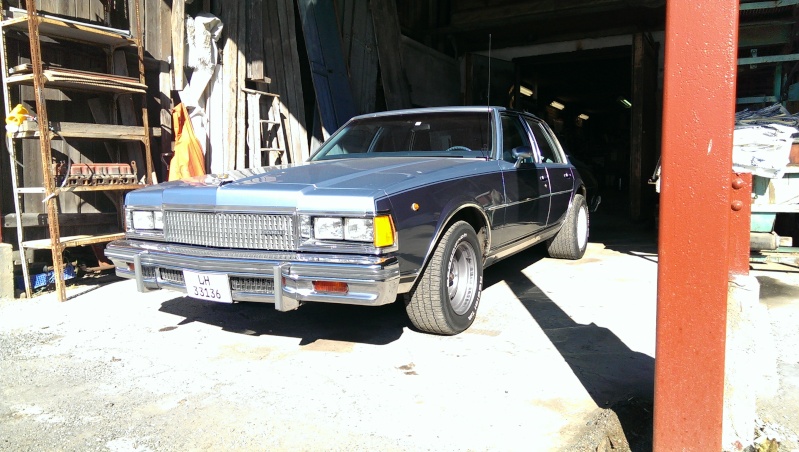
To get the front springs out, you have to do the following:
I like to loosen the top nut on the shocks with air tools first, and if the shock spins around you can go to plan B.
Plan B is jacking the car up in the lower control arm, securing it and removing the wheel.
Now you have nice access to the top nut on the shock between the upper control arm and the frame.
When the top nuts on the shocks are off (can be tricky sometimes), you can continue.
- Place the jack in the crossmember and raise the front end of the car. Secure it with jack stands.
- Remove the caliper and tie it to the top of the upper control arm
- Remove the sway bar end link
- Remove the two lower bolts on the shock, and remove the shock.
- Place another jack underneath the lower control arm. This is to catch the control arm when you loosen the upper ball joint.
- Loosen nut for the upper ball joint by 1/2", but DO NOT remove it. Clean away all dirt and grease around the area.
- Give the steering knuckle a couple of hard punches with a BFH right next to the ball joint, and if you're lucky it will break loose.
- If not, you will have to heat the area. I like to heat the bolt itself. This gives me plenty of clearance to the rubber grease-cup on the ball joint. You don't want to torch that..
- Give it another try with the hammer, but be careful not to hurt the bolt. Hit the knuckle only, and hit it sideways. No luck? Repeat the heating process. It will come.
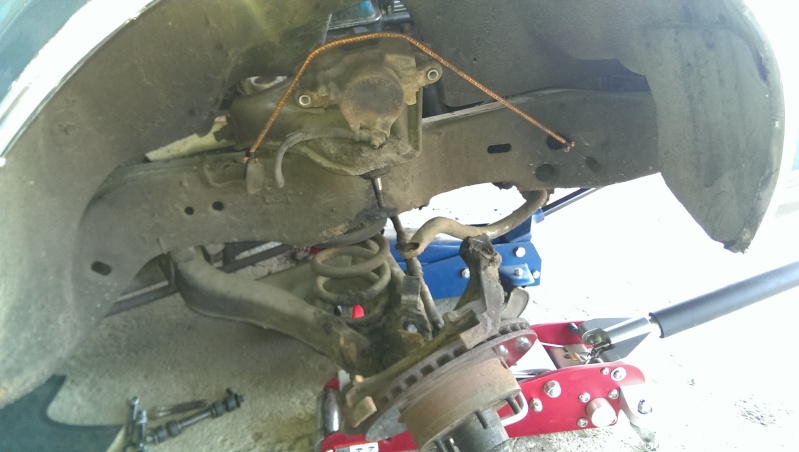
- When the ball joint has come loose, jack the lower control arm up so the nut spins freely. Remove the nut, and let the jack down slooowly until you are clear of the upper arm.
Now it should look something like this
Next step is to remove the springs.
I used two spring compressors of this kind. Remember to lube the threads!
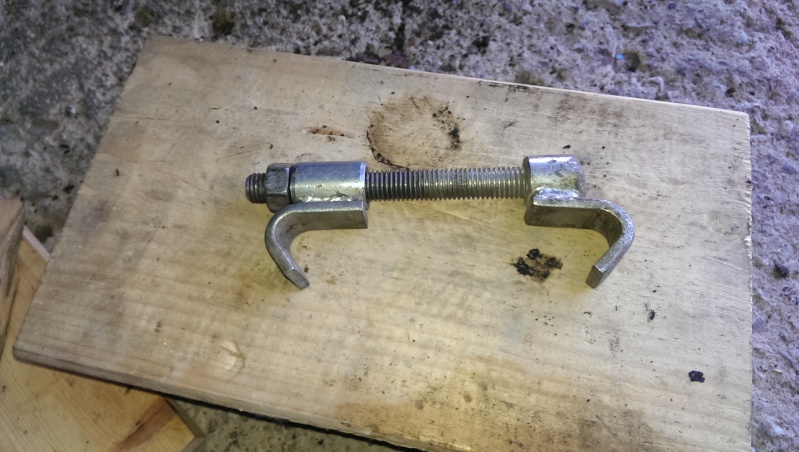
I like to jack the control arm up to compress the spring as much as possible before I put on the compressors.
It wasn't a lot of space there, so I put the compressors inside the springs instead of outside.
Then I could use a deep socket to tighten them through the shock hole in the control arm.
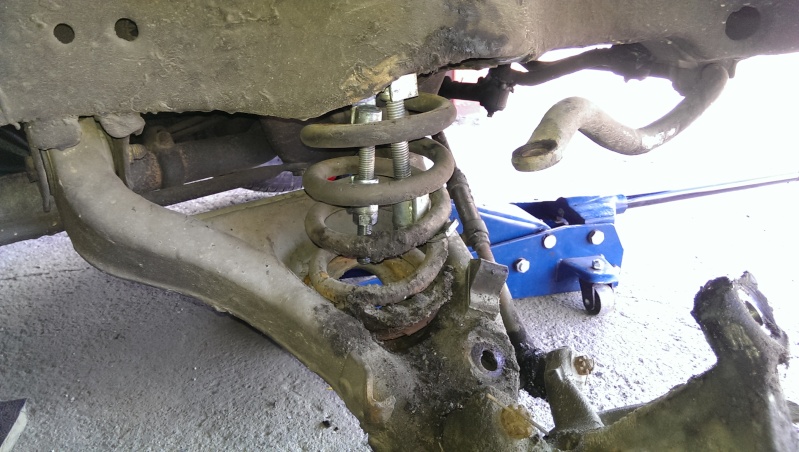
When the compressors are tight, you can lower the jack and hopefully the spring is compressed enough to just slip the spring out.
It might need a punch or two to unseat it from the control arm.
You might have to raise the front even more to get the control arm low enough.
When the spring is out, CAREFULLY loosen the compressors evenly on both sides until they pop off.
Keep a foot on the spring, and point it away from anything expensive.
I like to use air tools for the job, as it goes faster.
This is the old spring compared to the new one
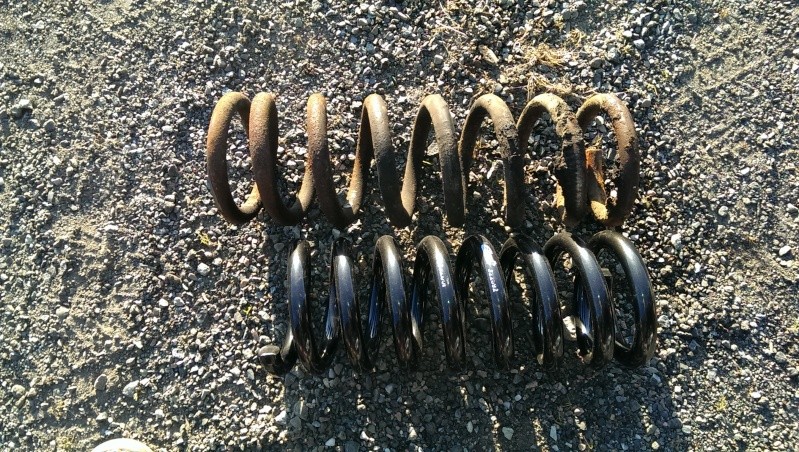
Clean the area, and make notice of the rotation of the old spring. Mine ended just between the two holes in the control arm.
Now, compress the new spring slightly. Just enough to get it in place.
Make sure it's seated, especially in the top. The less you compressed it, the harder it will be..
Place it exactly the same way as the original spring, and jack up the control arm.
Make sure it's still in place as you raise the arm, and on your way up you connect the upper ball joint and tighten the nut.
If you're lucky, one or both of the spring compressors are now loose, and can be removed by hand.
Assemble everything, and remember to grease both ball joints before mounting the wheel. You have moved them around a lot.
The rear is simpler
Jack the car up by the rear axle and put the frame on jacks.
I like to use 4 jacks on the car, as the rear is so long. At least put one under the trailer hitch if you have one.
Let the axle down as far as it goes.
Two ways:
1: Loosen both shocks and maybe the brake line to just take the springs out. (Have not tried that one)
2: Compress the springs slightly and take the springs out. Because of the exhaust, the right might have to go through the fender. I had to remove the wheel and brake drum to get it out.
The new springs slipped in place with hand force. No need to compress, but a tight fit.
Here are the measurements (ground to fender):
Before:
Front: 71cm
Rear: 72cm
After:
Front: 68cm
Rear: 68.5cm
Lowering specs for the kit on this car:
Front: 3cm (about 1.2")
Rear: 3.5cm (about 1.4")
After:
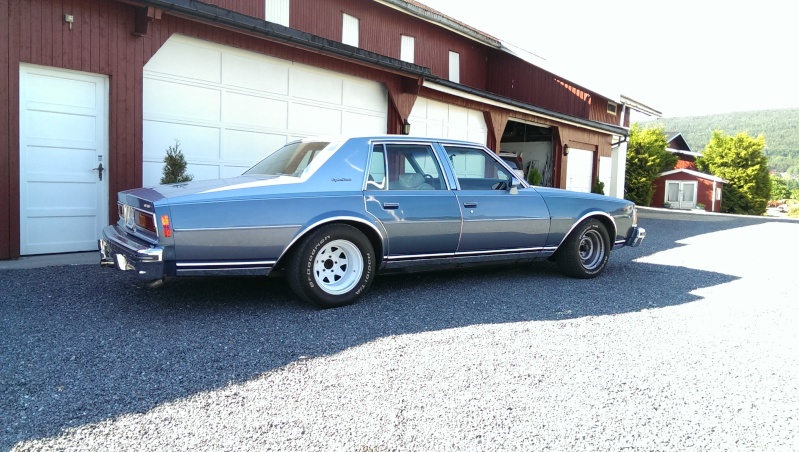
Another set of wheels, this time 215/70 on 15x8 with 4" BS and 255/60 on 15x10 with 4" BS.
I have now rolled the fender lips to prevent cutting the tires.
The car looks a little lower in the back, but I'm going to adjust that with my air shocks.
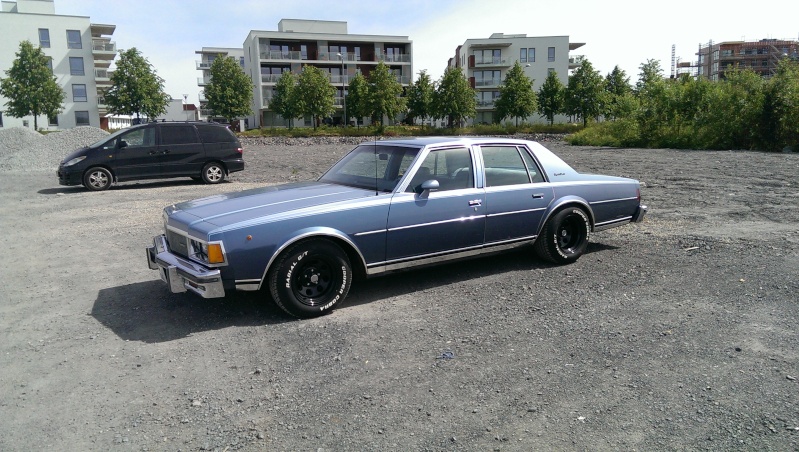
Right now I'm waiting on my final set of wheels from Summit.
It will be the American Racing Torq Thrust D in 15x8.5 (3.77" BS) with 245/60 up front, and 15x10 (3.77" BS) with 255/60 in the rear.
I really wanted 295's in the rear, but it will never fit with those wheels. 5" BS would have cleared the 295's.
I reused the shocks with no issues.
The ride is not much different from before, and the car is still comfy like it should.
This kit was perfect for me, and I love it
Hope this thread will help others choose the right lowering kit and wheels for their car.
Update:
New wheels from Summit.
Even with rolled lips, the rear wheels had fender contact in bumps and when the car was loaded.
So I installed a set of new Monroe MA751 adjustable air shocks from Rock Auto, and they did the trick!
American Racing Torq Thrust D in 15x8.5 (3.77" BS) with 245/60 up front, and 15x10 (3.77" BS) with 255/60 in the rear.
Perfect fit!


Last edited by CamaroKid on Fri Jan 16, 2015 4:03 am; edited 3 times in total


