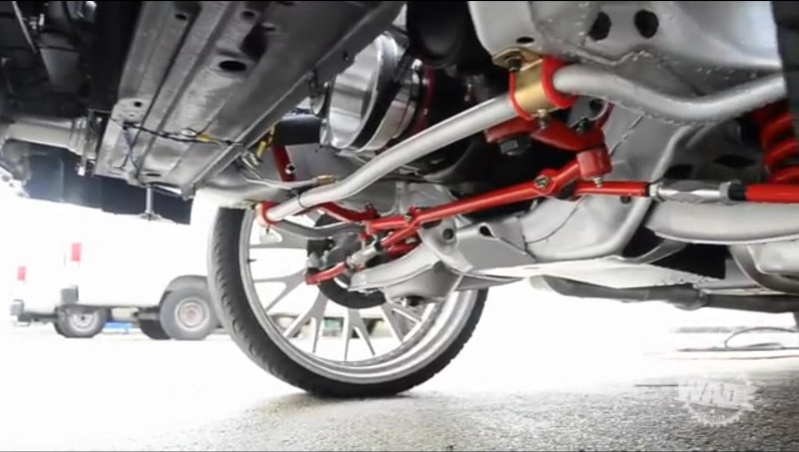
Got quite a bit of rust to deal with. I expected the pans to be a little rough, but I was NOT in anyway prepared for the rear package tray and possible early collision repair on the rear driver's side from what I can tell. I'll let the pics do the talking.
+9
bgkid2966
razzbury_shark
Myloth
jacob79caprice2dr
79treemaster
Sweet Seventy9
kartmaster
GM B-Body Forum
solo79
13 posters
'79 Chevy Caprice 2-door then and now...
solo79- *Senior Moderator*
- 10th Year Anniversary10 years of being a member on our forum!
- Posts : 458
Join date : 2013-02-06
Location : Kentucky
Finally got the interior gutted, well mostly. Still have the headliner and complete dash to go, but made some good progress despite it being in the upper 20s.haha I bundled up good and decided to tackle it.
Got quite a bit of rust to deal with. I expected the pans to be a little rough, but I was NOT in anyway prepared for the rear package tray and possible early collision repair on the rear driver's side from what I can tell. I'll let the pics do the talking.
solo79- *Senior Moderator*
- 10th Year Anniversary10 years of being a member on our forum!
- Posts : 458
Join date : 2013-02-06
Location : Kentucky
solo79- *Senior Moderator*
- 10th Year Anniversary10 years of being a member on our forum!
- Posts : 458
Join date : 2013-02-06
Location : Kentucky
Something happened to this car at some point as it appears on the driver's side the brace has been welded (sloppy I might add). At first, I thought maybe the whole quarter panel/wheel house has been replaced from a bad hit, but the more I looked at it today, the sealer is the same color as the other side and the only real repair work I can see is that one welded area. Everything else looks factory, so it could be a factory defect that was fixed...I don't know. The rear package tray is a mess. The rear window is not even sealed at the bottom and I can push up on it. It has an unbelievable amount of silicone built up all around it which leads me to believe the window has been replaced or "re-sealed" horribly in place. I've got my work cut out for me, just wish it would warm up some. I started to get frost bite and had to stop.
GM B-Body Forum- Admin
- Helpful and Responsive Member!Very active with responding and helping other members with questions and concerns.10th Year Anniversary10 years of being a member on our forum!
- Posts : 756
Join date : 2013-01-14
Age : 32
Location : Flint/Detroit, MI - Charlotte, NC
Holy cow! that thing is pretty bad. Glad mine is not like that. I had a 84 caprice 4 door and that thing was a rust bucket, rockers were gone, both front floor pans were gone, front and rear window pillars rotted out, i had plans to restore it, but im glad i got rid of it. You definitely have your work cut out for you, and some one did a hack job welding, ive only welded a few things in my life and i bet i could do better than that. If only your car could talk, because i dont know whats going on with all those repairs, or as my grandma would say (half ass job lol). Well at least your stopping it from further rust, and can repair it right, and seal it up good. Your car must be from the rust belt. I bought my 79 from nebraska and there is no rust like that. I feel bad for you because i hate rust and body work.
solo79- *Senior Moderator*
- 10th Year Anniversary10 years of being a member on our forum!
- Posts : 458
Join date : 2013-02-06
Location : Kentucky
Yea, I don't like this much rust either, but with this particular car, they are too hard to find in any condition, so I was prepared for whatever.lol Except the package tray has me puzzled. None of the quarter rusted next to the package tray and none of the trunk metal and wheelhouse underneath is rusted either. I simply found rusted metal shavings all over the area, but the trunk area and quarter is unharmed which is strange. When it's all said and done, ALL of the inside metal will be coated with POR 15 and all of the bottom side metal will be coated in POR 15 effectively encasing the metal and making it moisture proof.
solo79- *Senior Moderator*
- 10th Year Anniversary10 years of being a member on our forum!
- Posts : 458
Join date : 2013-02-06
Location : Kentucky
Update on the engine. My buddy was over last weekend and using his super advanced smartphone was able to take a picture of the back of the engine block to get my numbers for me. I'm happy to say it is a 350 #3970010. I'm still wondering though why it has a 2-barrel intake and carb. I read somewhere where all the 350s in these cars had 4-barrels, but my vin is a 350 vin and it has a 350 in it (not sure if it's the original block or not), but has a 2-barrel intake and carb. Anyway, I'm extremely happy it has a 350, so the rebuild can commence once I get it out.
GM B-Body Forum- Admin
- Helpful and Responsive Member!Very active with responding and helping other members with questions and concerns.10th Year Anniversary10 years of being a member on our forum!
- Posts : 756
Join date : 2013-01-14
Age : 32
Location : Flint/Detroit, MI - Charlotte, NC
well thats good, and yeah they all came with 4bbl's. Being that your car has been worked on like the diff color interior, that weld job, im sure the motor wasnt untouched
solo79- *Senior Moderator*
- 10th Year Anniversary10 years of being a member on our forum!
- Posts : 458
Join date : 2013-02-06
Location : Kentucky
Dash and headliner...you're out of there.
If anyone ever needs to take out one of these dashes, it's probably the easiest dash you'll ever remove. Seriously, it's the easiest dash I've ever taken out. The previous owner definitely replaced this dash and I could tell right away from some missing screws and one missing nut on the main mount. You don't even have to drop the column to get this out, it's that easy. The headliner is in great condition. The roof has some surface rust, but I've yet to remove the insulation that's stuck to it to see behind it. In the rear that insulation looks like it's been wet and it's hanging down, so I'm afraid of what I'll find in that area.
Next I'll be labeling all the wiring before I pull it all out, then the ductwork, then the steering column. Speaking of ductwork, both the "hoses" on both sides were junk and pulled apart. I suspect the previous owner did that trying to remove them although they are pretty brittle. I have two old vacuum cleaners in the attic and I got to thinking...and sure enough the vacuum cleaner flexible hose is a perfect fit. So instead of sourcing that cheaply made duct hose, I'll be upgrading it with flexible plastic. Even though it will never be seen, it will be cool and functional and probably last a lot longer.
GM B-Body Forum- Admin
- Helpful and Responsive Member!Very active with responding and helping other members with questions and concerns.10th Year Anniversary10 years of being a member on our forum!
- Posts : 756
Join date : 2013-01-14
Age : 32
Location : Flint/Detroit, MI - Charlotte, NC
I see you have the dome delay option, i love it on mine, i didnt know mine had it, it was unplugged somehow. And yes id have to agree about the dash, i took it out of my 84 cap, it was fast and easy like a half hour of work. I ant remember where but you can buy that hose buy the foot, i think it was like rockauto or the local auto parts stores website, but i like your idea of the vacuum cleaner hose, why not? lol I tend to find the roofs inside like to rust, mine is a little rusty, and on my 84 it actually rotted through at a few spots, im not sure why, but when ever i do a full restore ill be sure to coat the roof.
solo79- *Senior Moderator*
- 10th Year Anniversary10 years of being a member on our forum!
- Posts : 458
Join date : 2013-02-06
Location : Kentucky
Dome delay? lol where's that at. I love how you can spot that in all that wiring. It's not that relay looking thing by the passenger kick panel is it? I wasn't sure what that was yet. I'm pretty sure my other Caprice didn't have that item, but it's been so long I don't remember for sure. By the way, how the HECK do you get the headlight switch/knob out of the dash? I can't figure that one out yet. The pull knob won't simply pull off and there's no retainer ring or screws holding switch, however it does turn a 1/4 back and forth, but it won't let go. I need that out so I can repaint the dash shell with a nice SEM black in the future as it's a little faded.
GM B-Body Forum- Admin
- Helpful and Responsive Member!Very active with responding and helping other members with questions and concerns.10th Year Anniversary10 years of being a member on our forum!
- Posts : 756
Join date : 2013-01-14
Age : 32
Location : Flint/Detroit, MI - Charlotte, NC
Its that orange box under the steering column. And the relay on the pass side kick panel is the door lock relay. Im an auto electrical engineer so to speak( i dont have a degree in that if there is a such thing) its one of my specialties, Ive done alot of auto electrical work. I know these cars inside and out for the most part lol. Ahhh yes the headlight switch, i remember that! to save you some trouble there is a little button on the bottom side all the way to the front of the switch which is the side closest to the dash that you push in and pull the knob out, its a little hard to find, but youll find it. But the dome delay was option C94, it keeps the lights on about 30 secs when either of the doors open, and they turn off immediately once you switch the ignition on. And then when you switch the ignition off, they come back on for about 15 seconds, until you open the door, then it resets for 30 secs. Its a cool feature, i actually bought a nos delay switch about two years ago just in case, and i seen one on ebay not too long ago.
solo79- *Senior Moderator*
- 10th Year Anniversary10 years of being a member on our forum!
- Posts : 458
Join date : 2013-02-06
Location : Kentucky
Ahhh, thanks for the info!! Now it makes sense. My first 79 didn't have power windows or locks, so that's why that relay was strange to me. Now I know what to label the orange box. I may have some questions on other items as I start labeling. This is the first time I've ever pulled a dash on one of these cars. I love how simple the car is though. Only thing going towards the rear away from the dash is rear speakers, taillight harness, power seat, and electric trunk. Easy and simple. The fun part will be removing all of the a/c and heat control vacuum tubing without breaking it. All of it inside the car is still nice and soft, but the ones on the outside are hard as a rock, so I'll probably be replacing it all from the firewall forward. That's simple enough though.
I think I'm going to redo the factory wiring up in the dash too, clean it up, reroute it and loom it all. It just looks messy. Also, the previous owner broke the shift indicator selector cable (which is really easy to unhook) can't believe he broke it, well yes I can.lol He broke a lot of other things too, all fixable but annoying. Also, tell me, why do people use DRYWALL screws in cars? I just don't get it.
solo79- *Senior Moderator*
- 10th Year Anniversary10 years of being a member on our forum!
- Posts : 458
Join date : 2013-02-06
Location : Kentucky
The color scheme has now been chosen. I am 100% decided. The color it currently is has grown on me tremendously. It will be the current color only a shade or two lighter. Not sure, but I think I'm going to X the vinyl top idea, but I will be installing the vinyl top small termination trim pieces from the quarter glass to rear window since it looks good on there with or without a top. I'll have those chrome plated. The car will have a nice factory looking black interior with bucket seats the same as I had before out of an 80s Cutlass and a custom center console. I will also be converting the car to floor shift. It will also feature a nice overhead console similar to what I had in my first car. The interior will be accented in some chrome, but will be mostly black.
ALL of the inside metal in the interior including the roof will be prepped, repaired and treated with gloss black POR 15. ALL of the under body and frame will also be prepped and treated with gloss black POR 15. Every inch of metal I can get to will be coated. This car will be rust proofed. All of the suspension will be powder coated/and or POR 15. I'll break up some of the black with some silver/platinum color and body color as well underneath.
Even though, I'm building a lowrider out of it first, I decided there may come a day when I get tired of that, so there will be no crazy chrome plated undercarriage or scrolled candied frame stuff. The way I install the hydraulics will be such that they can be removed and replaced with either stock springs and shocks or lowering springs. The frame will be completely boxed front to back reinforced with 3/16" metal including under the doors making it SUPER strong. This will ensure that any hydraulic motion won't bend the frame. This won't be a hopper or abused. My first car wasn't abused either, but even it bent the frame at the passenger side rear arch.
The weakest point is the rear arches and when you couple weight of batteries and pumps in the trunk behind the rear arches, even a good bump will thrust the weight downward bending the arches. That's how my first car got bent, simply by hitting a huge dip in the road at 55 mph on the passenger side. It buckled the quarter panel some as well and I was furious, but it was too late.
GM B-Body Forum- Admin
- Helpful and Responsive Member!Very active with responding and helping other members with questions and concerns.10th Year Anniversary10 years of being a member on our forum!
- Posts : 756
Join date : 2013-01-14
Age : 32
Location : Flint/Detroit, MI - Charlotte, NC
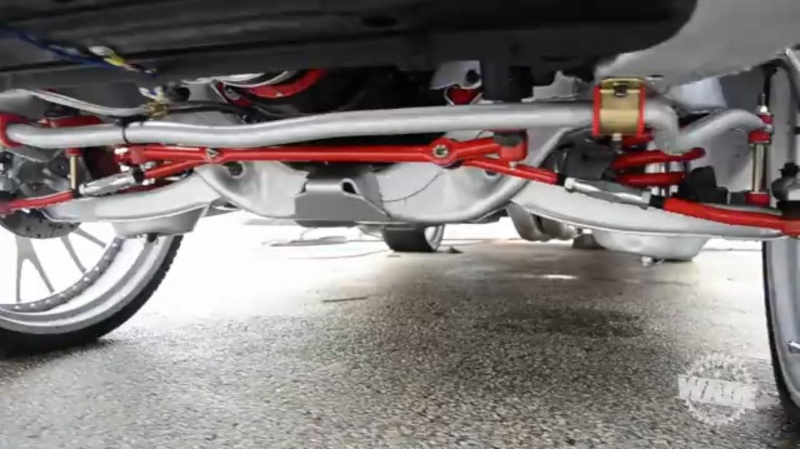
Sounds good to me. I also have my plans all laid out, and for the most part everything that will be done to it, will easily be allowed to go back to stock, just in case. Im gonna keep my original two tone color choice, its a perfect combo no need to change it. I too will POR 15 everything once a frame off happens. My whole theme is going to be pro-touring, i just love that for some reason and ive not seen a pro-touring caprice. My interior is perfect, its all set. But i am going to add a floor shifter also, and i might have to get different seats if they get in the way, and since now i know cutlass seats would work (ive also heard s10 seats work also) ill check to see then. It does amaze me how much stress a low rider puts on the frame. Also ive been debating to go black or silver for the POR15 on the frame, ever since i seen this vid on youtube of a 4 door 77-79 that had a full frame off, i think i like his color choice. I took a screen shot, i wont have the huge rims, but the colors are just working for me.
solo79- *Senior Moderator*
- 10th Year Anniversary10 years of being a member on our forum!
- Posts : 458
Join date : 2013-02-06
Location : Kentucky
Yea, that undercarriage looks pretty good there. That's kind of what I want to do except the frame will be black. Speaking of seats, I can tell you what will NOT work at all in these cars. 82 Trans Am seats. I have an extra set of the PMD seats and after removing the front seats from the caprice, we put the PMD seats in there. It looked awesome, but when you sit in them, you can't see over the dash.lol You feel like you are sitting on the floor. Of course you are sitting on the floor in a Firebird, but the dash is lower.lol
GM B-Body Forum- Admin
- Helpful and Responsive Member!Very active with responding and helping other members with questions and concerns.10th Year Anniversary10 years of being a member on our forum!
- Posts : 756
Join date : 2013-01-14
Age : 32
Location : Flint/Detroit, MI - Charlotte, NC
So basically GM used the same brackets on almost all their cars? I was thinking of putting a seat of cheap racing seats in from like summit or where ever, but if TA seats are too low, i know those will be.
Sweet Seventy9- *Senior Moderator*
- Helpful and Responsive Member!Very active with responding and helping other members with questions and concerns.10th Year Anniversary10 years of being a member on our forum!
- Posts : 973
Join date : 2013-11-03
Location : Upstate NY
I hope you don't mind me butting in, but I've tried MANY different seats in our cars.
Any F body seat will work, they just need to have the brackets switched to ones from a B body.
2nd Gen F body work better than 3rd or 4th Gen.
80's G body work great, but need the brackets changed too.
They both will be slightly lower than the stock bench seat, but not much.
It's a bonus though.... placing the drivers weight lower will help handling.
70's cutlass/monte/grand prix seats work the best, imo.
Direct bolt in with no changes and keep close to the original height.
Plus theres more padding than F body seats for a more comfy ride.
79treemaster- Active Member (Tier 2)
- 10th Year Anniversary10 years of being a member on our forum!
- Posts : 78
Join date : 2013-09-02
Location : Huber Heights, Ohio
I got a friend that has some swivel buckets out of a 1974 Monte Carlo, I wonder how those would fit and what do I need to make them work.
Sweet Seventy9- *Senior Moderator*
- Helpful and Responsive Member!Very active with responding and helping other members with questions and concerns.10th Year Anniversary10 years of being a member on our forum!
- Posts : 973
Join date : 2013-11-03
Location : Upstate NY
There's a set in a 75 Cutlass I was gonna grab for my last Impala, but I found out the cutlass swivel brackets will not fit our B bodies and they're not interchangeable. I'm not sure about the Montes. IIRC, the Cutlass of that time was still based on the Chevelle platform (A-body??). The Monte, being a larger platform, might just bolt right in?79treemaster wrote:I got a friend that has some swivel buckets out of a 1974 Monte Carlo, I wonder how those would fit and what do I need to make them work.
Try 'em and let us know.
GM B-Body Forum- Admin
- Helpful and Responsive Member!Very active with responding and helping other members with questions and concerns.10th Year Anniversary10 years of being a member on our forum!
- Posts : 756
Join date : 2013-01-14
Age : 32
Location : Flint/Detroit, MI - Charlotte, NC
No ofcourse not, im glad you let us know about the seats, i didnt know that. I feel if i did find a set of 70-81 f body seats and i mated it with my 6 way power bracket, i could just raise it up if it was too low(in theory ofcourse lol)Sweet Seventy9 wrote:I hope you don't mind me butting in
solo79- *Senior Moderator*
- 10th Year Anniversary10 years of being a member on our forum!
- Posts : 458
Join date : 2013-02-06
Location : Kentucky
Sweet Seventy9 wrote:I hope you don't mind me butting in, but I've tried MANY different seats in our cars.
Any F body seat will work, they just need to have the brackets switched to ones from a B body.
2nd Gen F body work better than 3rd or 4th Gen.
80's G body work great, but need the brackets changed too.
They both will be slightly lower than the stock bench seat, but not much.
It's a bonus though.... placing the drivers weight lower will help handling.
70's cutlass/monte/grand prix seats work the best, imo.
Direct bolt in with no changes and keep close to the original height.
Plus theres more padding than F body seats for a more comfy ride.
Heck no, I don't mind. I welcome any and all feedback and help that you have of course! I had thought about putting the 3rd gen Firebird seats I have on different tracks, but I'd have to custom make a finish panel because they would be sitting up higher and have a huge gap around them. The 80's Cutlass seats I used in my blue Caprice did not simply bolt right in, but that was because that Caprice had a full bench and thus no inner studs/mounts. The outside mounts worked fine on the Cutlass seats, in fact they lined right up, but we had to custom make inside mounts/studs. I'm wondering if the same Cutlass seats would bolt right into my current Caprice since it had split seats and already has 4 mounts.
It's also worth mentioning that the Firebird seats didn't bolt right in there. We could only get one stud to line up enough in the front to put a nut on to hold them still to test. Those tracks are way off, but after seeing how low they sit in the car, I talked myself back into the seats I had before. Plus, the third gen Firebird seats just looked too small overall in the car. I hope I can find a set of those same Cutlass seats in the junkyard this weekend because they want a mint for them on Ebay. I paid like 20.00 for the pair back in the day.lol
Sweet Seventy9- *Senior Moderator*
- Helpful and Responsive Member!Very active with responding and helping other members with questions and concerns.10th Year Anniversary10 years of being a member on our forum!
- Posts : 973
Join date : 2013-11-03
Location : Upstate NY
solo79 wrote: The 80's Cutlass seats I used in my blue Caprice did not simply bolt right in, but that was because that Caprice had a full bench and thus no inner studs/mounts. The outside mounts worked fine on the Cutlass seats, in fact they lined right up, but we had to custom make inside mounts/studs. I'm wondering if the same Cutlass seats would bolt right into my current Caprice since it had split seats and already has 4 mounts.
Sorry, when I stated they bolt right in I should have stated that if you already had the 50/50 split bench seat they'd bolt right in. You still need to swap the brackets though or they'll be WAY too low. Well, actually I guess it's each individuals choice, but I'm 6' and they were too low for me. The B body brackets brought them up almost to the same height as the factory height.
You might have to slide one bracket (aka: slider) forward or backward a bit to get all 4 holes to line up with the 4 studs, but that's it.
Each slider will move independently of the other one.
solo79 wrote:It's also worth mentioning that the Firebird seats didn't bolt right in there. We could only get one stud to line up enough in the front to put a nut on to hold them still to test. Those tracks are way off, but after seeing how low they sit in the car, I talked myself back into the seats I had before. Plus, the third gen Firebird seats just looked too small overall in the car. I hope I can find a set of those same Cutlass seats in the junkyard this weekend because they want a mint for them on Ebay. I paid like 20.00 for the pair back in the day.lol
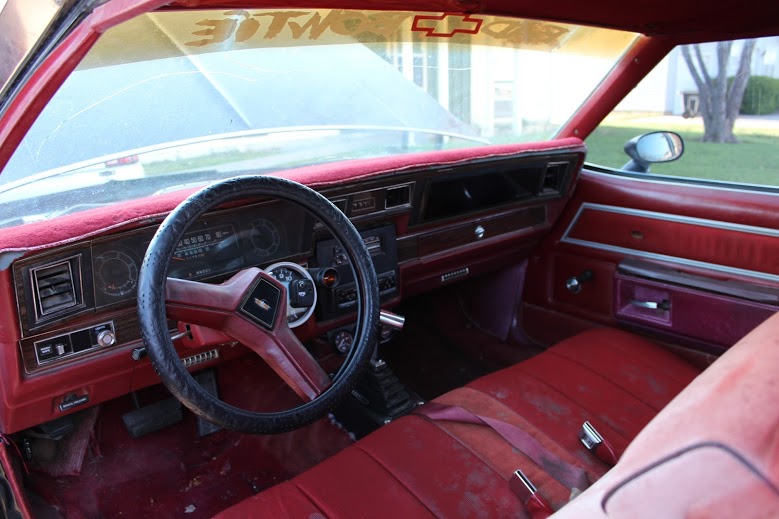
Like I was saying, 1st Gen Camaro seats work better than 2nd or 3rd Gen, and that except for the 70s Cutlass/Monte Carlo/Grand Prix seats, they'll all have to have the brackets swapped.
Once the buckets are in have you considered a floor console and shifter?
A floor console and shifter from a 73(?) to 76(?) Cutlass, both 2 and 4 door, work great in B bodies. Yes, I said 4 door, lol I don't remember the exact years but you could order bucket seats and a floor console in a 4 door back then. Pretty cool, huh?
solo79- *Senior Moderator*
- 10th Year Anniversary10 years of being a member on our forum!
- Posts : 458
Join date : 2013-02-06
Location : Kentucky
Oh yea, center console and floor shift is a go! I laid out the plans for the car a few posts up. I just need to find a steering column that is non-column shift and will work in my car. Any ideas?
GM B-Body Forum- Admin
- Helpful and Responsive Member!Very active with responding and helping other members with questions and concerns.10th Year Anniversary10 years of being a member on our forum!
- Posts : 756
Join date : 2013-01-14
Age : 32
Location : Flint/Detroit, MI - Charlotte, NC
take the little pin out of the column shifter you have now, the lever will come right off, and its very subtle, unnoticeable for the most part. One of the members on here did that and put a tach in its place. Heres his pic: His member name is Kartmaster
solo79- *Senior Moderator*
- 10th Year Anniversary10 years of being a member on our forum!
- Posts : 458
Join date : 2013-02-06
Location : Kentucky
Well, that's a good idea. I just didn't want two shifters in the car.lol It would be funny looking. I also plan on painting the steering column black as well.
Speaking of gauges, Dakota Digital makes a killer instrument cluster for our cars, but MAN it's expensive. Are there any factory clusters out there from 77-90 that have temp, oil press, fuel, tach, volts gauges INSTEAD of idiot lights? I was thinking about running a separate gauge panel to monitor the engine because when the lights come on, it's already too late.lol I would then keep the stock cluster for looks. I really like that Dakota Digital one though, but wow, north of 800.00 for that.